InDesign Data Merge Tutorial
About InDesign Data Merge
InDesign’s built-in Data Merge feature is an extremely useful solution for creating product catalogues, letters, envelopes, business cards, mailing labels, coupons, ads, or any other data publishing jobs.
InDesign Data Merge enables you to create an InDesign document that contains data-field placeholders, and then automatically populate another document from a file containing all the data.
The InDesign document that contains all the data-field placeholders is called the Target Document.
The file storing all the data for your publication is called the Data Source. The Data Source can be in either a comma-delimited (.csv) or a tab-delimited (.txt) file format.
The publication itself is called the Merged Document. It contains any text and images that you placed into the Target Document, and records populated from the Data Source.
Using Best InDesign Templates professional Target Document templates you can create fast, flexible data-driven layouts. Do keep in mind that InDesing Data Merge has some limitations that make it unsuitable for some publishing jobs.
Some limitations you should keep in mind are:
- InDesign Data Merge does not do conditional formatting. For example, if you have different product collections, you may want product names to be blue for collection A, red for collection B, and orange for collection C. You would like InDesign to look up the collection name and, based on this information, change the color. Data Merge cannot do that.
- InDesign Data Merge does not do conditional content. For example, if you have different product families, you may want to include a certain field for one category but not for another. Data Merge cannot do that. If there is a field in the Target Document and the Data Source has data for that field, the Merged Document will contain that data.
- InDesign Data Merge does not do conditional record numbering. For example, if you have a Target Document with places for six products, the Merged Document will have six products per page. You cannot have six products on one page, five on another, and three on another. You can, however, create dummy records in your Data Source, do the Data Merge, and then delete the empty records form the Merged Document.
About InDesign Data Source file
Data Source is the file with your product data: the file from which InDesign will take all the information to create the Merged Document. This file usually comes from a spreadsheet or database application. The file should be saved in either comma-delimited (.csv) or tab-delimited (.txt) format.
The Data Source file should contain all the records that you want to merge, as well as information about the images you would like to use.
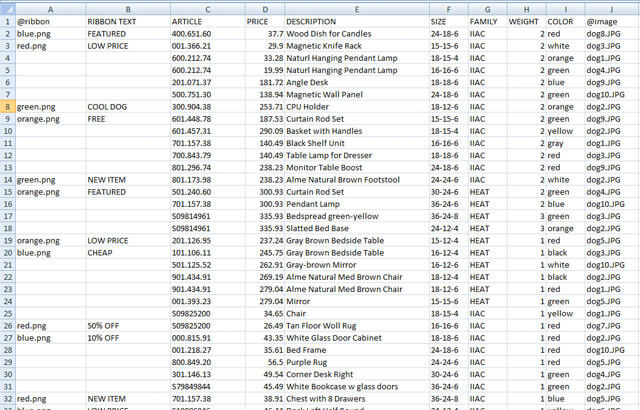
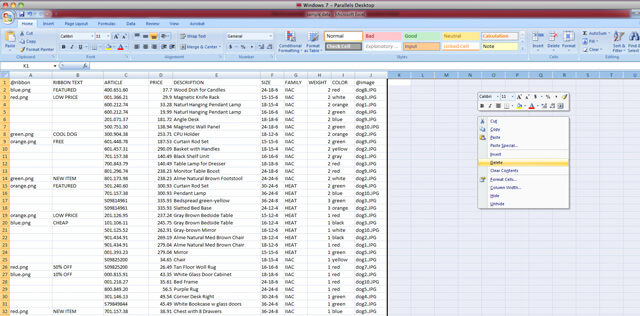
Below is a Data Source sample.
The first row of the Data Source file is the header row, and should list column headings. Those headings will be used by the Target Document; make column names descriptive so you can understand which data it refers to.
You can’t have any empty cells in the header row of your Data Source file. It’s OK to have data that you won’t be using in the Merged Document, and it’s OK to have empty cells, as long as they are not in the header row of the Data Source file.
If you would like the Merged Document to show different images for the records, your Data Source file should contain information about the locations of those images.
If you reference an external file in the Data Source, it should always have an @ sign before the column name. Note, in the sample Data Source shown above, the columns named “@ribbon” and “@image”. Both of those columns tell the Target Document which image to take for which record.
Note that the @ symbol is only required in the header row of the Data Source; other rows simply tell InDesign where your data is. If you get an error while typing the @ symbol, simply add an apostrophe before the symbol. In the Data Source sample above, this would be ‘@ribbon and ‘@image.
There are two ways of adding paths into a Data Source file.
- Type the full path to your image. For Windows, this will be something like C:PhotosDog1.jpg. For Mac, this will be something like Macintosh HD/Photos/Dog1.jpg. This solution works well if your images are saved in different locations on your computer and will never move.
- Type only the name of the image, i.e. Dog1.jpg. This solution only works if all the images are saved in the same folder. For this solution to work you must save the Data Source file in the same folder as the images you are referencing. In the Data Source sample above, all images are saved in folder “links” and the Data Source file itself is saved in the folder “links” as well. The advantage here is that if you move the whole folder elsewhere at some point, the image links won’t break.
Once your Data Source is ready you can proceed with Step One of Data Merge.
InDesign Data Merge
Step One: Open the Target Document
Simply open the Target Document template. This file will have *.indd file extension. If you see a “Cannot open file” InDesign error message, this is likely to be because the Target Document was created in a newer version of InDesign and can’t be opened with your version. In that case, see if you have the same template with a *.inx or *.indl file extension and open it.
InDesign can only perform a Data Merge if the Target Document has a single page. If your Target Document comes with multiple pages (for example, a product catalogue template with a page for three products, a page for six products, a page for eight products, etc.) you will need to delete the pages you are not using for the Data Merge you are about to generate.
Step Two: Select Data Source
The very first step of the Data Merge is to tell InDesign what your Data Source file is. Please note that you can only have one Data Source selected per Target Document.
Open Data Merge Panel
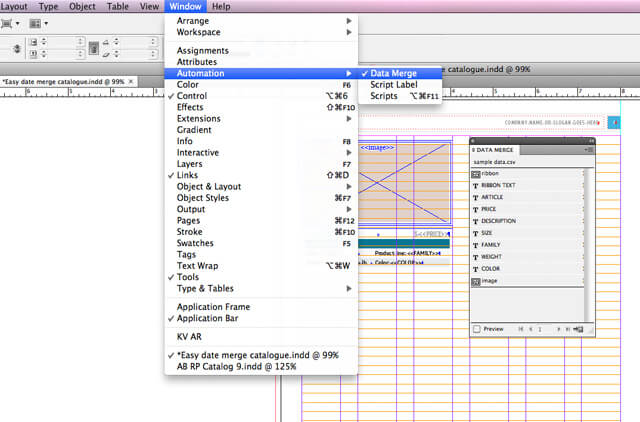
Open the Data Merge panel (Window > Automation > Data Merge or Window > Utilities > Data Merge) if you don’t already have it open.
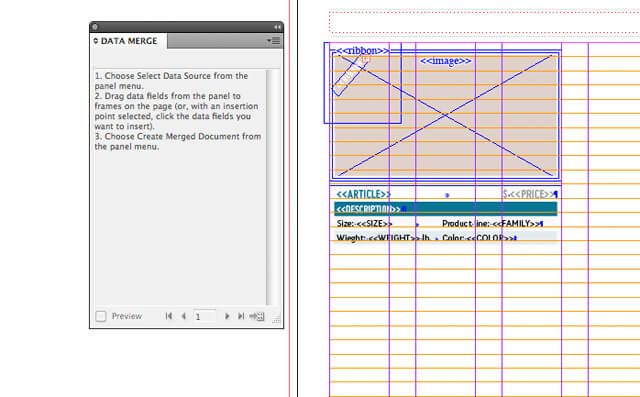
Note that, in case you don’t remember how Data Merge works, the panel describes the most important steps of the process. The panel says:
- Choose Select Data Source form the panel menu.
- Drag data fields form the panel to frames on the page (or, with an insertion point selected, click the data fields you want to insert).
- Choose Create Merged Document from the panel menu.
You will only see those instructions if no Data Source file is selected for the Target Document. Once the Data Source has been selected, you will see the data fields instead.
We will explain those steps in detail.
Choose Select Data Source from the panel menu
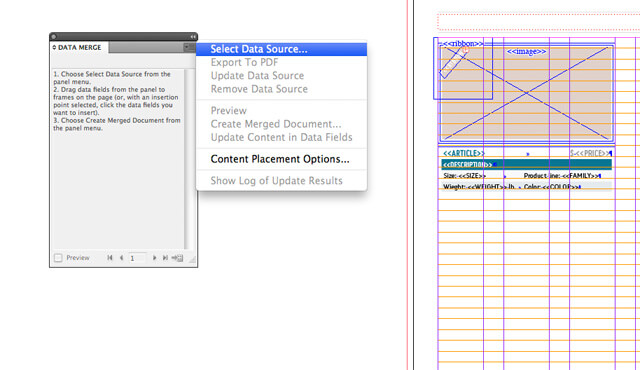
Choose Select Data Source from the Data Merge panel menu, locate the Data Source file, and click Open. If you purchased Data Merge Template form Best InDesign Templates you can do a sample Data Merge by using the “sample data.csv” file provided with the template. You can find it in the folder where all the images are located; usually the “links” folder.
If you get an error message saying, “The selected data source has one or more empty field names. Please fix the file or select another file.”, make sure that your Data Source file does not contain empty columns. To be sure, simply select any empty columns after the last column with your data and delete them – even if they seem to be empty already.
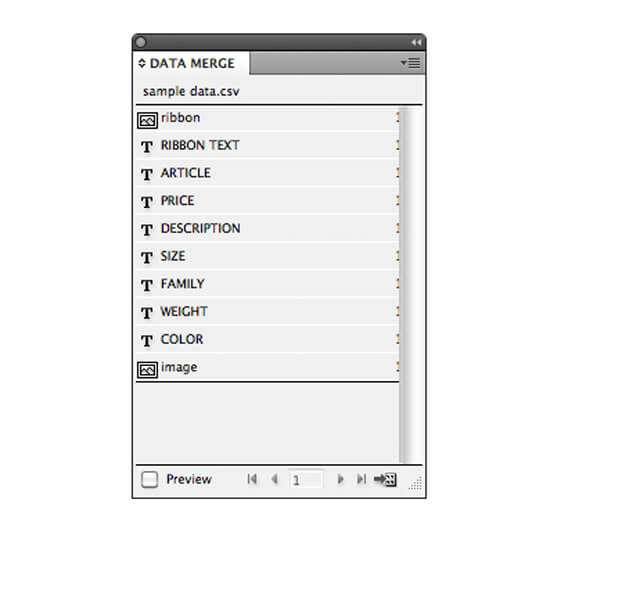
Once the Data Source is selected, you will see all column names from the first row of your Data Source file in the Date Merge palette. “Sample data.csv” is the name of Data Source used. The small icons next to the field names show you whether the field references text or image data.
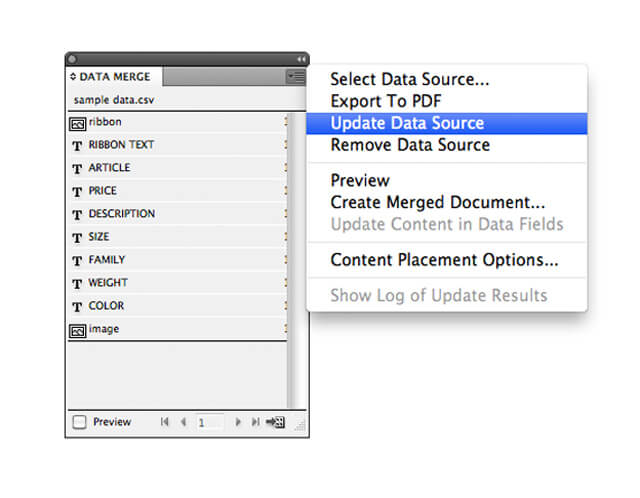
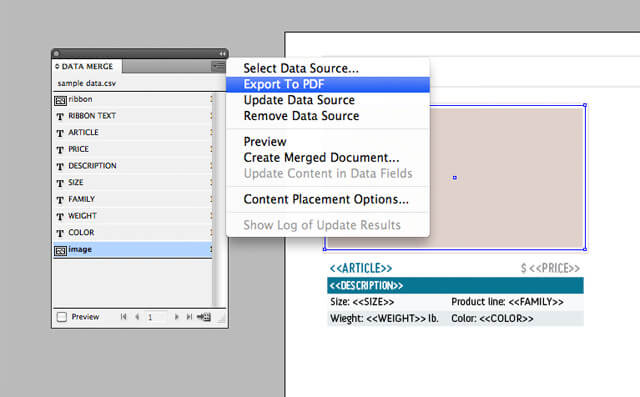
Please note that if, at any time, you change data in the Data Source file, those changes will not be reflected automatically. For the changes to be effective, you will need to update the Data Source info. You can do this by choosing Update Data Source from the Data Merge panel menu.
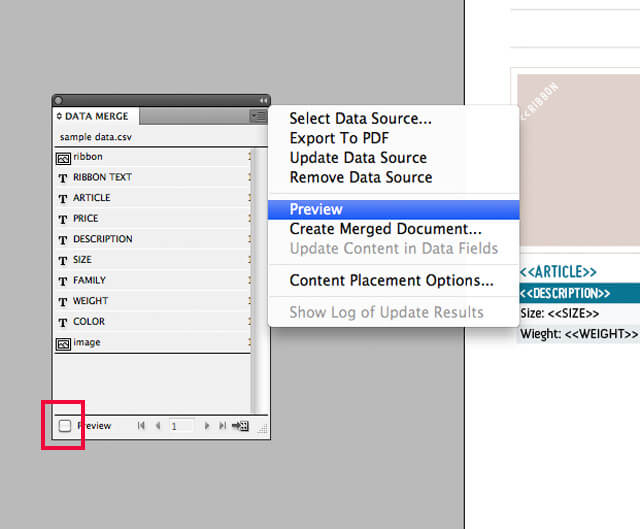
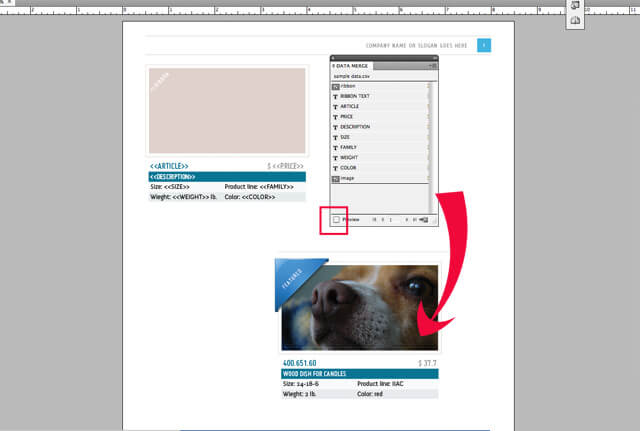
If you are working with a pre-made Target Document template, and everything is in order, you should be able to preview a single record now.
Check the “Preview” checkbox or choose “Preview” from the Data Merge panel menu.
You should now see how your record will appear in the Merged Document.
Step Three: Define the data fields form
When the preview is turned off, you see where the data from your Data Source file will go. Notice the <<>> characters around the field name – those are added automatically to indicate Data Source fields. Any text that does not have <<>> around it is added directly into the Target Document. A good example is the price field: you can add a currency sign to each single record in your Data Source ($4.99 and not 4.99), and then you only need to place the field itself (<
>); or you can add a currency sign into the Target document ($ <
>) and have only values in the Data Source file.
Using available fields in your Data Merge panel, you can add, delete, or replace fields.
To delete a Data Source field: select the field (including the <<>>) and delete it just as you would delete regular text.
To add a new Data Source field: place your caret where you would like the field to appear and click the field name in the Data Merge panel.
To change a Data Source field: select the field (including the <<>>) and click on the field name you would like to replace it in the Data Merge panel.
Adding, deleting, or changing images works in the same way, but you have to select the image placeholder first.
Step Four: Create Merged Document
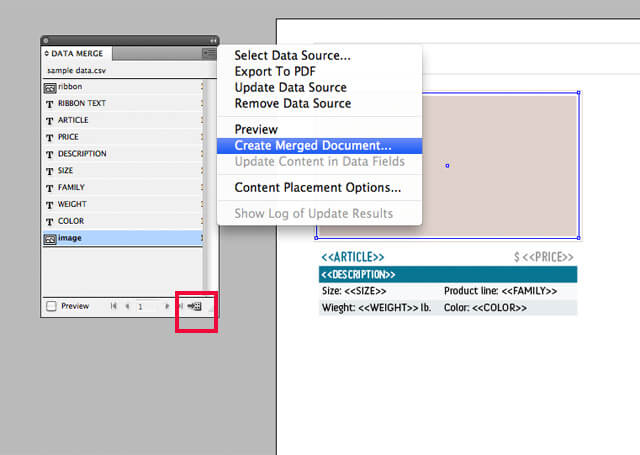
Once you are ready to create the Merged Document you can either click the Create Merged Document icon in the Data Merge panel or choose Create Merged Document… from the Data Merge panel menu.
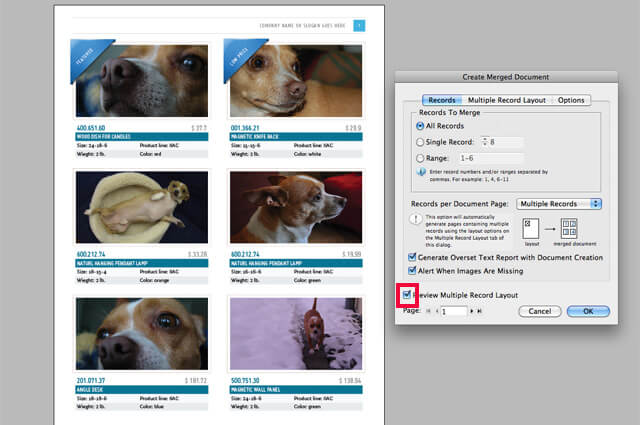
You probably want to tweak some settings before creating the Merged Document, though, so please choose Create Merged Document… from the Data Merge panel menu; this will open the Create Merged Document dialog window with different options.
If you purchased Data Merge Template from Best InDesign Templates please check Settings.pdf for sample setting you can use to create the Merged Document.
Records To Merge: this is where you can tell Data Merge which records to merge and in what order. If you are merging all records from your Data Source, select “All Records”. Select “Single Record” to merge a specific record. Specify a “Range” of records for multiple records. You can enter record numbers and/or ranges separated by comma; for example, 5, 1, 12–14, 2, 6.
Records per Document Page: you can choose either single or multiple records on a page. “Single Record” will automatically generate pages containing one or more copies of the same record, using your Target Document’s layout. “Multiple Records” will automatically generate pages containing multiple records using the layout options in the Multiple Record Layout tab of the Create Merged Document dialog window.
If the Multiple Records option is not selectable, make sure you only have one page in your Target Document.
Select Generate Overset Text Report with Document Creation to automatically create a report that will tell you which data from your Data Source were too long and did not fit into the provided placeholders.
Select Alert When Images Are Missing to create a report that will tell you which images are missing in the Merged Document.
If you selected Multiple Records under the Records tab, click the Multiple Record Layout tab to select additional options to arrange multiple data file records on each page.
Margins: specify document margins.
Layout Records: choose whether you want records to be arranged by row or by column, and specify the spacing between rows and columns.
The Options tab allows you to specify content placement options. Choose Fit Frames Proportionally, Center In Frames, and Link Images. You may want to choose different options for different Merged Documents.
At any time, you can choose to preview how your Merged Document will look by selecting the “Preview Multiple Record Layout” checkbox.
When ready, hit “OK” and the Merged Document will be generated.

